1st September 2019 • 10 min read
How to create & manage a Postgres database in NodeJS from scratch

Seif Ghezala
Notice: Before you jump in and start reading, it's important to understand that this is not a tutorial you'd read while sitting in public transportation or on your toilet seat. You might want to find a nice place to sit for an hour and follow the tutorial.
We have 1 goal: set up a production-ready NodeJS backend for a blog.
Just by targeting that goal, we will learn:
What a database schema is and how to design it. How to quickly create a Postgres database based on that schema with 1 command.
How to visualize & interact with the database with pgAdmin.
What an ORM is and what makes it better than using direct SQL queries. How to use the Sequelize ORM to perform migrations, seeds, and queries on the database.
Let's do this!
🎁 Gift: Here's a nice Spotify playlist to listen to while doing this.
Step 1: designing the database schema
The database schema is the blueprint of how the database will be organized. The schema indicates how this usually designed prior to building the database in order to best fit the application's requirements. Therefore, the first step should be to clearly define our blog's requirements.
What are the requirements of our blog?
Our blog requirements can be summarized in the following points:
We can have multiple users. Each user has a name, email, password (hash) and a profile picture URL. It's also important to keep track of when a user account is created or modified.
The blog can have multiple articles. Each article has a title, body, and minutes of reading. It's also important to keep track of when an article is created or modified.
A user can write one or many articles. An article can also have one or many authors.
Articles can be organized into categories. Each article can belong to one or many categories.
What entities can we extract from these requirements?
One way of looking at these requirements is to group them based on the following entities/atoms:
Users: they have a name, email, password (hash) and a profile picture URL.
Articles: they have a title, body, and minutes of reading.
Categories: they have a name.
Each entity represents a database table.
What are the relationships between these entities?
Now that we extracted the different database entities, we can extract the different relationships between them:
ArticleAuthors: this is the relationship between articles and users. Each user can have multiple articles and each article can have multiple users (authors).
CategoryArticles: this is the relationship between categories and articles. Each category can have multiple articles and each article can have multiple categories.
Each relationship represents a database table.
Drawing the database schema
That's it! Believe it or not, we already designed our database. The only thing left is to draw it with a database design tool such as dbdiagram.

Final database schema
Step 2: creating a Postgres database with 1 command
Instead of installing a million tools to be able to run our database, we will create and run it with 1 command using Docker.
If you don't have Docker installed already, you can install it here. To bootstrap a database, we can run the following command:
1docker run -d -p 5432:5432 --name my-postgres -e POSTGRES_PASSWORD=postgres postgresThis will run a Postgres Docker container containing by default a Postgres database called postgres. The database is then available on the port 5432.
One way of interacting with a Postgres database is via a UI tool such as pgAdmin.
After installing pgAdmin, let's create a server connection to our database. To do so, we right-click on Servers in the left tab and select Create then Server.
Connecting to our database
Let's call our connection blog in the General tab:
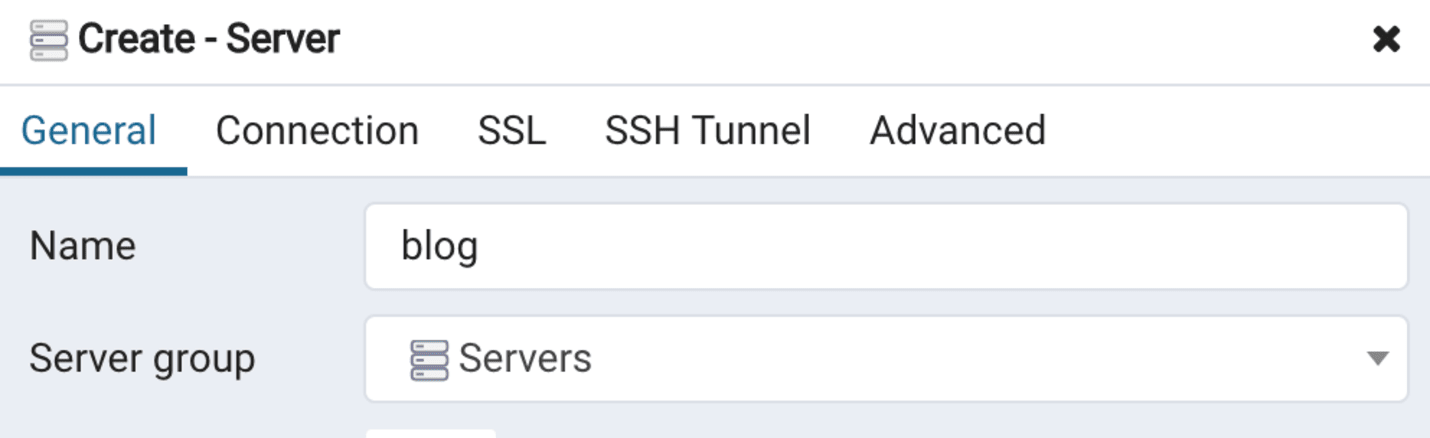
General tab when creating a server connection to our database
We can then enter the necessary information to connect to the database in the Connection tab:
1Host: localhost2Port: 54323Maintenance database: postgres4Username: postgres5Password: postgres
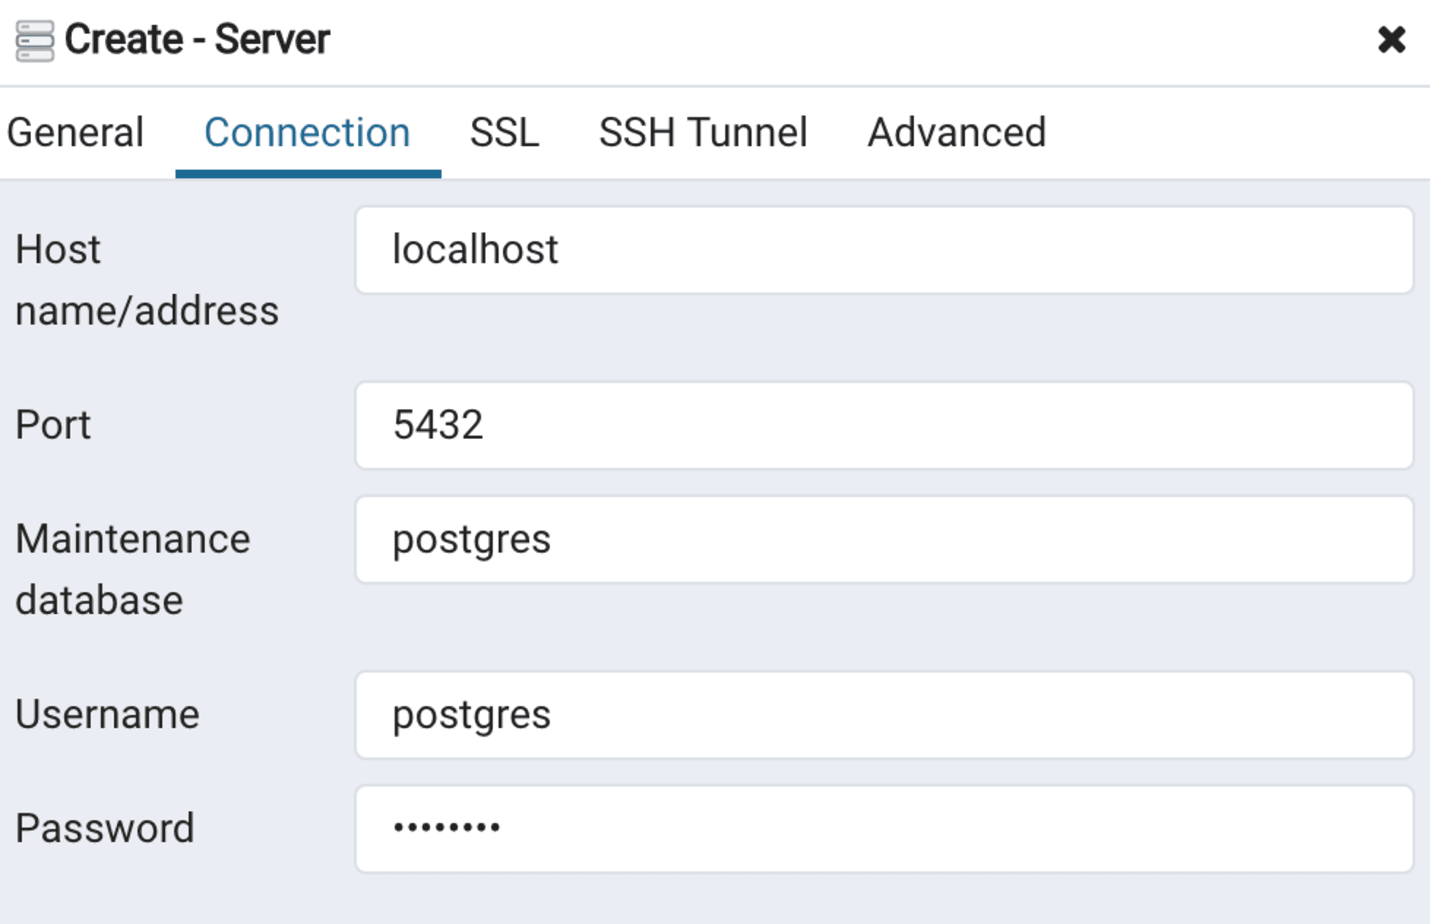
Connection tab when creating a server connection to our database
What's an ORM? 🤔
An ORM (Object-relational-mapper), is a tool that facilitates managing and interacting with a database without having to manually write SQL. An ORM avoids our backend from having long SQL queries all over the place and offers other features to reliably manage our database.
In the next few steps, we will install and use Sequelize, a NodeJS ORM.
Setting up the project
Let's first create an empty project folder blog and initialize it with npm:
1mkdir blog2cd blog3npm init -y
Let's also create an empty index.js file that will have the code for our server:
1touch index.jsInstalling Sequelize
Now let's go ahead and install Sequelize and its command-line tool:
1npm install sequelize sequelize-cliBootstrapping an initial project structure
sequelize-cli allows to quickly bootstrap a useful initial boilerplate that saves us some time. Let's do so by running the following command:
1./node_modules/.bin/sequelize initThe result should be something like:
1Created "config/config.json"2Successfully created models folder at ".../blog/models".3Successfully created migrations folder at ".../blog/migrations".4Successfully created seeders folder at ".../blog/seeders".
This command created the following:
A config/config.json file that will contain the necessary configuration to connect to our database in development, staging, and production environments.
A models/ directory which will have models. Models are simply blueprinting functions that map directly to our database tables. We will have a model for every table in our schema.
A migrations/ directory. Migrations are scripts that allow us to reliably transform with time our database schema and keep it consistent across environments. In other words, if we ever change our mind about the database schema we designed, migrations are the best way to change it without sweating on losing our data.
A seeders/ directory. Seeders are scripts to inject data in our database. We will use that to populate our database tables with test data.
Creating a migration for the tables
Guess what? dbdiagram allows us as well to export the necessary SQL statements to create our database. Let's go ahead and export the Postgres compatible SQL queries:

Exporting SQL queries to create our database tables
Let's save these queries under blog/queries/create-tables.sql. These queries will be used in our first migration to create the database tables and should contain the following:
1CREATE TABLE "Users" (2 "id" int PRIMARY KEY,3 "name" varchar,4 "email" varchar UNIQUE,5 "hash" varchar,6 "picture" varchar,7 "createdAt" timestamp,8 "updatedAt" timestamp9);101112CREATE TABLE "Articles" (13 "id" int PRIMARY KEY,14 "title" varchar,15 "body" varchar,16 "minutesRead" varchar,17 "createdAt" timestamp,18 "updatedAt" timestamp19);202122CREATE TABLE "Categories" (23 "name" varchar PRIMARY KEY24);252627CREATE TABLE "ArticleAuthors" (28 "authorId" int PRIMARY KEY,29 "articleId" int PRIMARY KEY30);313233CREATE TABLE "ArticleCategories" (34 "articleId" int PRIMARY KEY,35 "categoryName" varchar PRIMARY KEY36);373839ALTER TABLE "ArticleAuthors" ADD FOREIGN KEY ("authorId") REFERENCES "Users" ("id");40ALTER TABLE "ArticleAuthors" ADD FOREIGN KEY ("articleId") REFERENCES "Articles" ("id");41ALTER TABLE "ArticleCategories" ADD FOREIGN KEY ("articleId") REFERENCES "Articles" ("id");42ALTER TABLE "ArticleCategories" ADD FOREIGN KEY ("categoryName") REFERENCES "Categories" ("name");43Since Postgres doesn't support defining multiple Primary Keys with this syntax, let's modify the queries for creating ArticleAuthors and ArticleCategories:44CREATE TABLE "ArticleAuthors" (45 "authorId" int NOT NULL,46 "articleId" int NOT NULL,47 "createdAt" timestamp NOT NULL,48 "updatedAt" timestamp NOT NULL,49 CONSTRAINT pk1 PRIMARY KEY ("authorId","articleId")50);515253CREATE TABLE "ArticleCategories" (54 "articleId" int NOT NULL,55 "categoryName" varchar NOT NULL,56 CONSTRAINT pk2 PRIMARY KEY ("articleId","categoryName")57);
Let's also create drop-tables.sql in the same folder. This contains necessary queries to drop the tables in case we want to rollback our migration for creating tables:
1DROP TABLE "ArticleCategories";2DROP TABLE "ArticleAuthors";3DROP TABLE "Categories";4DROP TABLE "Articles";5DROP TABLE "Users";
Now, we can create our first migration, create-tables :
1./node_modules/.bin/sequelize migration:generate --name create-tablesThis creates the migration script create-tables containing the following:
1"use strict";2module.exports = {3 up: (queryInterface, Sequelize) => {4 /*5 Add altering commands here.6 Return a promise to correctly handle asynchronicity.7 Example:8 return queryInterface.createTable('users', { id: Sequelize.INTEGER });9 */10 },11 down: (queryInterface, Sequelize) => {12 /*13 Add reverting commands here.14 Return a promise to correctly handle asynchronicity.15 Example:16 return queryInterface.dropTable('users');17 */18 },19};20
Our migration file is pretty straight-forward and contains 2 functions:
up: executed to do the migration work. In our case, it will contain the script to create our tables.
down: executed to rollback (undo) the migration.
Notice that both functions receive queryInterface as argument. In the up function, we can use it to create our tables by running the queries in queries/create-tables.sql. In the down function, we can use queryInterface to drop the tables by running the queries in queries/drop-tables.sql:
1const fs = require("fs");2const path = require("path");3const readFile = require("util").promisify(fs.readFile);45module.exports = {6 up: async (queryInterface) => {7 try {8 const queryPath = path.resolve(9 __dirname,10 "../queries/create- tables.sql"11 );12 const query = await readFile(queryPath, "utf8");13 return await queryInterface.sequelize.query(query);14 } catch (err) {15 console.error("Unable to create tables: ", err);16 }17 },18 down: async (queryInterface) => {19 try {20 const queryPath = path.resolve(__dirname, "../queries/drop-tables.sql");21 const query = await readFile(queryPath, "utf8");22 return await queryInterface.sequelize.query(query);23 } catch (err) {24 console.error("Unable to drop tables: ", err);25 }26 },27};
Now let's run our migration:
1./node_modules/.bin/sequelize db:migrateOnce this is done, let's right-click on the postgres database in pgAdmin and click on refresh. After that, our tables should be available 🙌

Our tables in pgAdmin
Adding models & associations
Now let's add the necessary models for our tables. Their relationships can be translated through associations. Once we define associations, Sequelize is able to automatically perform join queries when needed.
Let's start with the User model:
1// models/User.js2const Sequelize = require("sequelize");3module.exports = function createUserModel(sequelize) {4 const User = sequelize.define(5 "User",6 {7 username: { type: Sequelize.STRING, allowNull: false },8 firstname: { type: Sequelize.STRING, allowNull: false },9 lastname: { type: Sequelize.STRING, allowNull: false },10 email: {11 type: Sequelize.STRING,12 allowNull: false,13 validate: { isEmail: true },14 },15 picture: {16 type: Sequelize.STRING,17 },18 hash: { type: Sequelize.STRING, allowNull: false },19 },20 {}21 );2223 User.associate = ({ Article, ArticleAuthors }) =>24 User.belongsToMany(Article, {25 as: "articles",26 through: ArticleAuthors,27 foreignKey: "authorId",28 });29 return User;30};
Notice: sequelize automatically maps the createdAt and updatedAt fields.
The Article model looks as follows:
1// models/Article.js2const Sequelize = require("sequelize");3module.exports = function createUserModel(sequelize) {4 const Article = sequelize.define(5 "Article",6 {7 title: { type: Sequelize.STRING, allowNull: false },8 body: { type: Sequelize.STRING, allowNull: false },9 minutesRead: { type: Sequelize.INTEGER, allowNull: false },10 },11 {}12 );13 Article.associate = ({14 User,15 ArticleAuthors,16 Category,17 ArticleCategories,18 }) => {19 Article.belongsToMany(User, {20 as: "authors",21 through: ArticleAuthors,22 foreignKey: "articleId",23 });2425 Article.belongsToMany(Category, {26 as: "categories",27 through: ArticleCategories,28 foreignKey: "articleId",29 });30 return Article;31 };32};
The ArticleAuthors model is pretty short and looks as follows:
1// models/ArticleAuthors.js2module.exports = function createUserModel(sequelize) {3 return sequelize.define("ArticleAuthors", {}, {});4};5Now the Categories model contains the following:6// models/Category.js7const Sequelize = require("sequelize");8module.exports = function createUserModel(sequelize) {9 const Category = sequelize.define(10 "Category",11 {12 name: { type: Sequelize.STRING, allowNull: false }13 },14 {}15 );16 Category.associate = ({ Article, ArticleCategories }) =>17 Category.belongsToMany(Article, {18 as: "articles",19 through: ArticleCategories,20 foreignKey: "categoryName"21 });22 return Category;23};
Just like ArticleAuthors, ArticleCategories is pretty short:
1// models/ArticleCategories.js2module.exports = function createUserModel(sequelize) {3 return sequelize.define("ArticleAuthors", {}, {});4};
Inserting test data in the tables
Now let's create a seeder to test some data:
1./node_modules/.bin/sequelize migration:generate --name create-tablesThe seeder script has a syntax similar to migrations and uses queryInterface to seed data:
1const { hash } = require("../../utils");2module.exports = {3 up: async (queryInterface) => {4 try {5 const authorId = 1;6 const articleId = 2;7 const categoryNames = ["React", "Node"];8 await queryInterface.bulkInsert(9 "Users",10 [11 {12 id: authorId,13 username: "elvira93",14 firstname: "Elvira",15 lastname: "Chenglou",16 email: "elvira@demo.com",17 hash: hash("WallayBillayItsaPassword"),18 createdAt: new Date(),19 updatedAt: new Date(),20 },21 ],22 {}23 );2425 await queryInterface.bulkInsert(26 "Articles",27 [28 {29 id: articleId,30 title: "Bilal writes all the titles",31 body:32 "Les pyramides comme tu sais, on est là. Fais attention, on est chaud, il y a des scientifiques dans la place.",33 createdAt: new Date(),34 updatedAt: new Date(),35 },36 ],37 {}38 );3940 await queryInterface.bulkInsert(41 "Categories",42 [43 {44 name: categoryNames[0],45 },46 {47 name: categoryNames[1],48 },49 ],50 {}51 );5253 await queryInterface.bulkInsert(54 "ArticleAuthors",55 [56 {57 authorId,58 articleId,59 createdAt: new Date(),60 updatedAt: new Date(),61 },62 ],63 {}64 );6566 await queryInterface.bulkInsert(67 "ArticleCategories",68 [69 {70 articleId,71 name: categoryNames[0],72 },73 {74 articleId,75 name: categoryNames[1],76 },77 ],78 {}79 );80 } catch (err) {81 console.error("Error in seeding: ", err);82 }83 },84 down: (queryInterface) => {85 const deleteArticleCategories = queryInterface.bulkDelete(86 "ArticleCategories",87 null,88 {}89 );90 const deleteArticleAuthor = queryInterface.bulkDelete(91 "ArticleAuthors",92 null,93 {}94 );95 const deleteUser = queryInterface.bulkDelete("Users", null, {});96 const deleteArticle = queryInterface.bulkDelete("Articles", null, {});97 const deleteCategory = queryInterface.bulkDelete("Categories", null, {});9899 return Promise.all([100 deleteArticleCategories,101 deleteArticleAuthor,102 deleteUser,103 deleteArticle,104 deleteCategory,105 ]);106 },107};