1st December 2018 • 7 min read
How to make and test your own React drag and drop list with 0 dependencies

Seif Ghezala
I know, drag and drop is a solved problem. There are several great utilities you can use to easily have a drag and drop list in your application (dragula, react-beautiful-dnd, and react-dnd). These libraries offer APIs that make it easy to meet your needs without worrying about what is happening under the hood. Most of them hide a complex logic to make the drag and drop work properly on several devices, whether touch or not.
However, using external dependencies comes at a cost. In fact, it increases the bundle size of your application, which can affect its overall performance. You also become dependent on the maintenance of the library.
Therefore, before rushing to use a library, you should take a look at your problem and ask yourself if there is a simple way to solve it without relying on a library.
For instance, if your application does not target touch devices and you want to keep your bundle size as lean as possible for an optimal performance, you should consider implementing your own drag and drop component.
This is exactly what this article will guide you through. You will be using the native HTML5 Drag & Drop API to create and test your own drag and drop sortable list:
Final result
The final source code & tests can be found here.
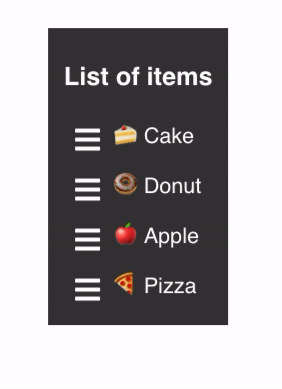
In this first iteration, we will just create the view without any drag & drop behavior.
The state is composed of a list of food items. The food items are unique, so we can use them as keys when rendering the list items. The uniqueness of the food items will also be used later in the sorting logic.
The styles are basically just to color the container and the list items( <li> ), set the padding in them, and set a move cursor in the drag div (containing the hamburger icon) to make it clear to the user that it’s draggable.
1class App extends React.Component {2 state = {3 items: ["🍰 Cake", "🍩 Donut", "🍎 Apple", "🍕 Pizza"]4 };56 render() {7 return (8 <div className="App">9 <main>10 <h3>List of items</h3>11 <ul>12 {this.state.items.map(item => (13 <li key={item}>14 <div className="drag">15 <Hamburger />16 </div>17 {item}18 </li>19 ))}20 </ul>21 </main>22 </div>23 );24 }25}
1.App {2 font-family: sans-serif;3 font-size: 1.5rem;4 text-align: center;5 width: 100vw;6 height: 100vh;7 display: flex;8 justify-content: center;9 align-items: center;10}1112.App main {13 background-color: #383838;14 color: #fff;15 padding: 10px;16}1718.App ul {19 margin: 0;20 padding: 0;21 list-style: none;22}2324.App ul li {25 background-color: #383838;26 padding: 10px 20px;27 position: relative;28 display: flex;29 align-items: flex-start;30 line-height: 1;31}3233.App li .drag {34 margin-right: 15px;35 cursor: move;36}3738.App li svg {39 height: 2rem;40 color: #fff;41}
Creating the view: Result
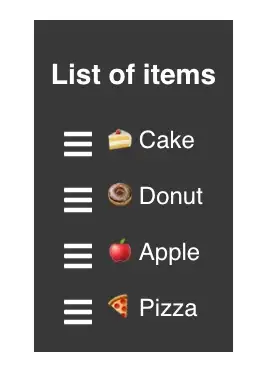
To make the items draggable, we add the draggable (shorthand for draggable={true}) prop to the drag div.
1class App extends React.Component {2 state = {3 items: ["🍰 Cake", "🍩 Donut", "🍎 Apple", "🍕 Pizza"]4 };56 render() {7 return (8 <div className="App">9 <main>10 <h3>List of items</h3>11 <ul>12 {this.state.items.map(item => (13 <li key={item}>14 <div className="drag" draggable>15 <Hamburger />16 </div>17 {item}18 </li>19 ))}20 </ul>21 </main>22 </div>23 );24 }25}
Adding the draggable attribute: Result
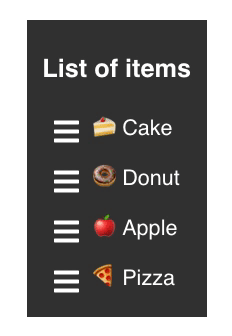
Although the icon is draggable, it’s not quite yet what we want to achieve. We want the whole item row to be draggable through the icon.
To do so, we need to specify what we want to be draggable in the onDragStart event handler:
1class App extends React.Component {2 state = {3 items: ["🍰 Cake", "🍩 Donut", "🍎 Apple", "🍕 Pizza"]4 };56 onDragStart = e => {7 e.dataTransfer.effectAllowed = "move";8 e.dataTransfer.setData("text/html", e.target.parentNode);9 e.dataTransfer.setDragImage(e.target.parentNode, 20, 20);10 };1112 render() {13 return (14 <div className="App">15 <main>16 <h3>List of items</h3>17 <ul>18 {this.state.items.map((item, idx) => (19 <li key={item}>20 <div21 className="drag"22 draggable23 onDragStart={this.onDragStart}24 >25 <Hamburger />26 </div>27 {item}28 </li>29 ))}30 </ul>31 </main>32 </div>33 );34 }35}
We set the drag effect to be ‘move’. This indicates that the visual effect will be moving the item.
e.dataTransfer.setData("text/html", e.parentNode) sets the dragged item to be the parent node of the drag div, being the list item. This is necessary for browsers like Firefox to achieve our desired effect.
e.dataTransfer.setDragImage(e.parentNode, 20, 20) does the same thing as the previous method. This is necessary for Chrome to achieve our desired effect.
Making the items draggable: Result
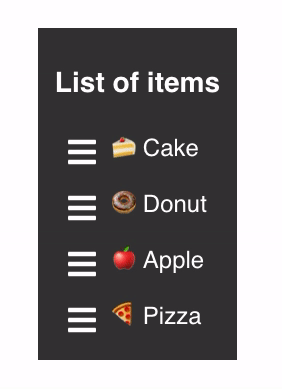
Our items are draggable through the drag icon! We want now to make dragging items affect their sorting.
When an item has another item dragged over it, we need to react (no pun intended 😅) to that by changing the sorting of the list. If item A is dragged over item B, then item A gets placed after item B.
First, we should store the currently dragged item when the dragging starts (i.e. in the onDragStart event handler).
Then we should set the currently dragged item to null once the dragging is done. This can be done in the onDragEnd event handler, which is called once the user stops dragging.
We should also implement the sorting logic in the onDragOver event handler for each list item, which is called whenever an item has an element dragged over it.
1class App extends React.Component {2 state = {3 items: ["🍰 Cake", "🍩 Donut", "🍎 Apple", "🍕 Pizza"]4 };56 onDragStart = (e, index) => {7 this.draggedItem = this.state.items[index];8 e.dataTransfer.effectAllowed = "move";9 e.dataTransfer.setData("text/html", e.target.parentNode);10 e.dataTransfer.setDragImage(e.target.parentNode, 20, 20);11 };1213 onDragOver = index => {14 const draggedOverItem = this.state.items[index];1516 // if the item is dragged over itself, ignore17 if (this.draggedItem === draggedOverItem) {18 return;19 }2021 // filter out the currently dragged item22 let items = this.state.items.filter(item => item !== this.draggedItem);2324 // add the dragged item after the dragged over item25 items.splice(index, 0, this.draggedItem);2627 this.setState({ items });28 };2930 onDragEnd = () => {31 this.draggedIdx = null;32 };3334 render() {35 return (36 <div className="App">37 <main>38 <h3>List of items</h3>39 <ul>40 {this.state.items.map((item, idx) => (41 <li key={item} onDragOver={() => this.onDragOver(idx)}>42 <div43 className="drag"44 draggable45 onDragStart={e => this.onDragStart(e, idx)}46 onDragEnd={this.onDragEnd}47 >48 <Hamburger />49 </div>50 <span className="content">{item}</span>51 </li>52 ))}53 </ul>54 </main>55 </div>56 );57 }58}
If the dragged-over item is the same as the currently dragged item, nothing changes. Otherwise, we move the currently dragged item from its initial position in the array of items to be right after the dragged-over item.
Here you go, our list items are now draggable and sortable:
Final result
Drag and drop is a complex interaction and is hard to evaluate with a simple unit test.
We might think of using mock function calls in a unit test and check that the state of our component changed properly. While this would work, it remains a non-reliable test because it does not assure that the behavior is working as it’s supposed to be.
Our test should be as close as possible to how a user interacts with the drag and drop. Thus, we will write an end-to-end test that simply reproduces the dragging behavior and checks whether the sorting of the list changed properly. One library we can use is cypress.js.
After installing Cypress through npm or yarn, we can simply add a test file dragAndDrop.js to the cypress/integration directory:
1describe("Drag and Drop", () => {2 beforeEach(() => {3 cy.visit("http://localhost:3000/");4 });56 it("should move first item to 3rd position", () => {7 // when8 dragItem(1, 3);910 // then11 getListItemValue(1).should("have.text", "🍩 Donut");12 getListItemValue(3).should("have.text", "🍰 Cake");13 });14});1516// helper functions1718function dragItem(indexToMove, targetIndex) {19 const dataTranferMock = { setData: () => {}, setDragImage: () => {} };20 cy.get(`li:nth-child(${indexToMove}) > .drag`).trigger("dragstart", {21 dataTransfer: dataTranferMock22 });23 cy.get(`li:nth-child(${targetIndex})`).trigger("dragover");24}2526function getListItemValue(index) {27 return cy.get(`li:nth-child(${index}) > .content`);28}
The test drags the first item to the third position using the dragItem helper function. It then checks whether the list sorting has changed properly by checking the values of the affected list items.
The dragItem helper function drags the item at index indexToMove to the position at targetIndex . To do so, it triggers a dragstart event on the drag div at indexToMove(with a mock dataTransfer object so that our dragstart event handler doesn’t fail) and a dragover event on the list item as targetIndex .
The getListItemValue helper function gets the content DOM element inside the list item at the given index .
We can then run the test through:
1./node_modules/.bin/cypress runA nice benefit of using Cypress is that it quickly provides a video of the integration test once you run it:
Test video using Cypress